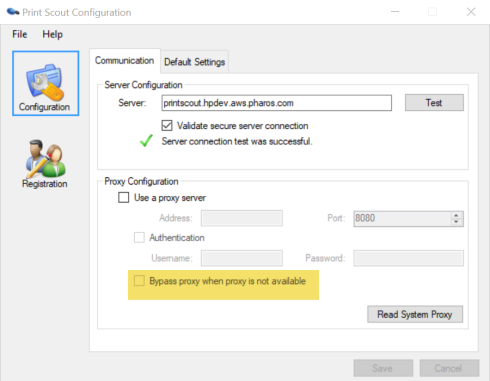
Configuring the Print Scout to use Proxy server
To configure Print Scout to use proxy server to communicate with the outside world:
- From the install directory of your first Print Scout, open the Print Scout Configuration tool.
- Click the Configuration > Communication tab.
- In the Proxy Configuration section, select the Use a proxy sever option and enter the following proxy server information.
| Setting | Description |
|---|---|
| Address | Enter a valid proxy server address. |
| Port | The port used by the proxy server. By default, the port is set to 8080. |
| Authentication | If required, enter the Username and Password to authenticate on the proxy server. |
4. Click Save.
You can also click Read System Proxy to pull the proxy settings from the local machine's configuration.
Automatic Proxy Bypass
Administrators can configure Print Scouts to automatically stop using the configured proxy should the system detect that it's not working. This feature is especially helpful for the traveling user who goes between home (no proxy) and the office (proxy).
You can enable this feature by selecting the Bypass proxy when proxy is not available option in the Print Scout Configuration tool.
